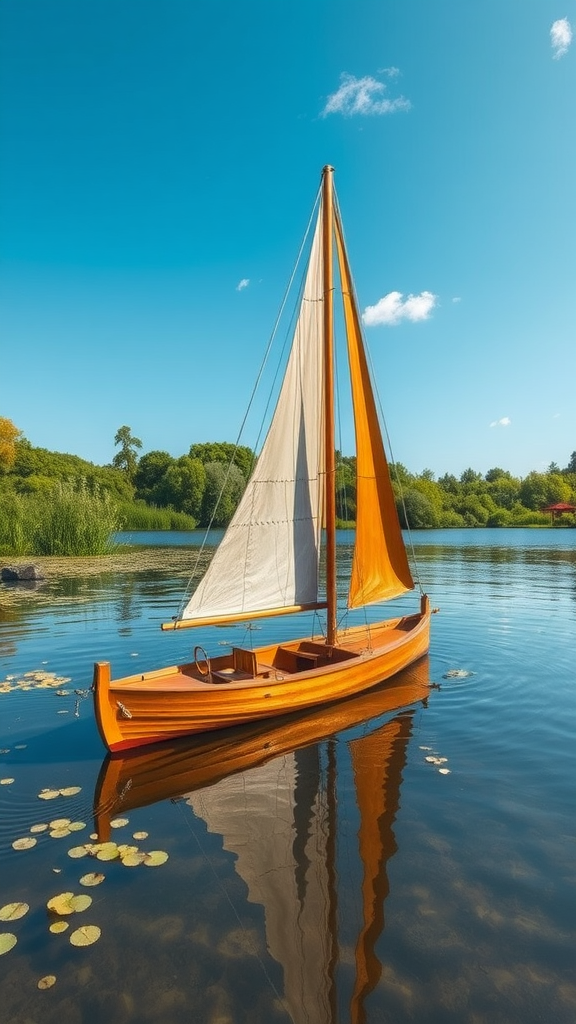
Step-by-Step Guide on How to Build a Wooden Pond Yacht
Building a wooden pond yacht can be a rewarding and fun project for enthusiasts of all ages. This guide provides step-by-step instructions to help you create your own miniature vessel. With careful planning and the right materials, you can enjoy sailing your handcrafted yacht on your pond.
Gather Your Supplies
Before you start building, it’s essential to gather all the necessary materials. Here’s a list of supplies you will need:
- Wood (e.g., balsa wood or pine)
- Wood glue
- Sandpaper (various grits)
- Paint or wood sealer
- Varnish (optional for finish)
- Model sail (available at craft stores)
- String or fishing line for rigging
- Small wooden dowels or skewers for mast and bowsprit
- Craft knife or saw
- Ruler and pencil for measurements
Design Your Pond Yacht
The design is an important step in building your yacht. You can either sketch your own design or use a simple template available online. Your yacht should have:
- A hull that is wide for stability
- A mast to support the sail
- Rudder for steering
Keep your design simple to make construction easier. Measure and draw the shape of your hull on paper before transferring it to wood.
Construct the Hull
Once you have your design, it’s time to cut the wood for the hull. Follow these steps:
- Using your craft knife or saw, carefully cut out the shape of the hull from the wood. Make sure to smooth any rough edges using sandpaper.
- For added buoyancy, consider making the hull thicker or using a hollow design. You can achieve this by gluing two pieces of wood together to create a thicker base.
- Allow the glue to dry completely before moving on to the next step.
Add the Mast and Rudder
Next, you need to attach the mast and rudder. Here’s how:
- Take the wooden dowel and cut it to the desired height for your mast. Craft a small hole in the center of the hull and insert the mast. Secure it in place with glue.
- For the rudder, cut a smaller piece of wood and attach it to the back of the hull using glue. Ensure it is vertical for better control while sailing.
Attach the Sail
Now that your mast is secure, it’s time to attach the sail. Follow these steps:
- Take the model sail and cut it to the appropriate size, ensuring it fits well on the mast.
- Attach the top of the sail to the mast. Use string or fishing line to tie it securely.
- attach the bottom of the sail to the hull. Adjust the angle to optimize wind capture when sailing.
Finish Your Yacht
After the main structure is built, it’s time to add finishing touches. Here’s what to do:
- Sand the entire yacht smoothly to prepare it for painting.
- Apply paint or wood sealer to protect it from water damage. Choose colors that make your yacht stand out.
- If you want a glossy look, consider applying a layer of varnish once the paint has dried completely.
Prepare for Launch
Once the yacht is finished, ensure everything is securely in place. Make any necessary adjustments before launching your wooden pond yacht into the water.
Sailing and Enjoying Your Creation
Find a calm day to sail your pond yacht. Gently place it on the water and watch it glide. You can experiment with different sail angles and wind directions to improve its performance. This is a great way to enjoy time outdoors and admire your handiwork.
Building a wooden pond yacht can be a fulfilling experience. With this guide, you can create a unique vessel that showcases your craftsmanship. Don’t forget to share your sailing adventures and maybe even inspire others to take on this delightful project!
Essential Tools and Materials for Crafting Your Own Pond Yacht
Crafting a wooden pond yacht can be a rewarding and enjoyable project. To ensure your voyage into this craft is smooth sailing, you will need the right tools and materials. Here’s a detailed breakdown of what you need to bring your pond yacht to life.
Essential Tools
To start the building process, gather a selection of tools that will help you shape, cut, and finish your wooden pond yacht. Here are the must-have tools:
- Hand saw or Jigsaw: These are essential for cutting your wood to the desired size and shape. A jigsaw is particularly useful for intricate curves and designs.
- Drill: A cordless drill will allow you to make holes for screws and fittings, essential for assembly. Make sure to have various drill bits on hand for different tasks.
- Screwdriver Set: A set of screwdrivers, both flathead and Phillips, is crucial for securing parts together. Consider a power screwdriver for ease and speed.
- Sandpaper or Electric Sander: Smooth out the edges of your wooden pieces using sandpaper or, for quicker results, an electric sander. This step is vital for ensuring a polished finish.
- Ruler and Square: Precise measurements are key in boat building. Use a ruler and a square to ensure your cuts are straight and your pieces fit together perfectly.
- Clamps: These will hold your pieces in place while you glue or screw them together. Having a few clamps in various sizes can be incredibly helpful.
- Paintbrush or Roller: For finishing touches, such as applying sealants or paint to protect your yacht from water damage.
Materials You’ll Need
With tools sorted, it’s time to gather the materials for your pond yacht. Choosing the right types of wood and other materials will enhance both the look and longevity of your craft:
- Wood: Opt for lightweight, water-resistant wood like cedar, mahogany, or marine plywood. These choices ensure your pond yacht stays afloat and withstands the elements.
- Wood Glue: A strong wood adhesive is essential for creating durable joints between wooden pieces. Look for waterproof varieties for added protection.
- Varnish or Paint: A good-quality marine varnish or waterproof paint will protect your yacht from moisture, UV rays, and wear. Choose colors that reflect your style or ensure high visibility on the water.
- Fiberglass (optional): If you want to add extra durability, consider using fiberglass cloth and resin to coat your wooden yacht, making it more water-resistant and robust.
- Wind Sail Fabric: If you’re planning to sail your yacht, choose a durable and lightweight fabric for the sails. Popular choices include Dacron or canvas.
- String or Wire: For rigging and securing sails, you’ll need a strong, flexible string or wire. Ensure it’s suitable for outdoor conditions, as it will face winds and moisture.
- Small Hardware (e.g., screws, hinges): Collect various sizes of screws, hinges, and eyelets for mounting sails and other elements. Stainless steel options will provide the best resistance to rust.
Each tool and material plays a crucial role in the construction of your wooden pond yacht, contributing to its functionality and aesthetics. By carefully selecting high-quality tools and materials, you set the stage for a successful building experience.
Preparation Steps
Before you dive into the crafting process, make sure to organize your workspace. Clearing a dedicated area for your project, where you can safely use tools and access materials, is essential for staying focused and productive.
Next, sketch out a design for your pond yacht. This blueprint will guide you through the construction process, helping you visualize how each piece will fit together. Make sure to include measurements to ease the cutting and assembly phases.
Consider safety while working on your yacht. Always wear protective gear such as goggles and gloves to safeguard against splinters and debris. Following all safety guidelines will make your crafting experience both enjoyable and secure.
By gathering the right tools and materials, you set the foundation for a successful pond yacht project. Happy building!
Conclusion
Building a wooden pond yacht can be a rewarding and enjoyable project, allowing you to blend creativity with craftsmanship. By following a clear step-by-step guide, you can navigate the entire process from start to finish with ease. With each stage, from design to assembly, you gain a deeper understanding of woodworking and boat building, enhancing your skills along the way.
Equipping yourself with the essential tools and materials is crucial to the success of your pond yacht. By gathering the right resources, such as quality wood, a sturdy workbench, and essential hand tools, you ensure that your project runs smoothly and efficiently. Investing time in selecting the best materials will not only enhance the aesthetic appeal but also improve the durability of your yacht.
As you embark on this satisfying venture, remember that patience and attention to detail are key. Each cut, each coat of varnish, and each step in the assembly process contributes to the final masterpiece. Take your time to appreciate each moment spent crafting your pond yacht and don’t hesitate to add personal touches that reflect your style.
Whether you’re building the pond yacht for yourself, as a hobby, or as a unique gift for someone special, you’ll create something truly meaningful. Embrace the challenge and enjoy the journey, knowing that the result will be a beautiful wooden pond yacht that can be cherished for years to come. Happy sailing!